

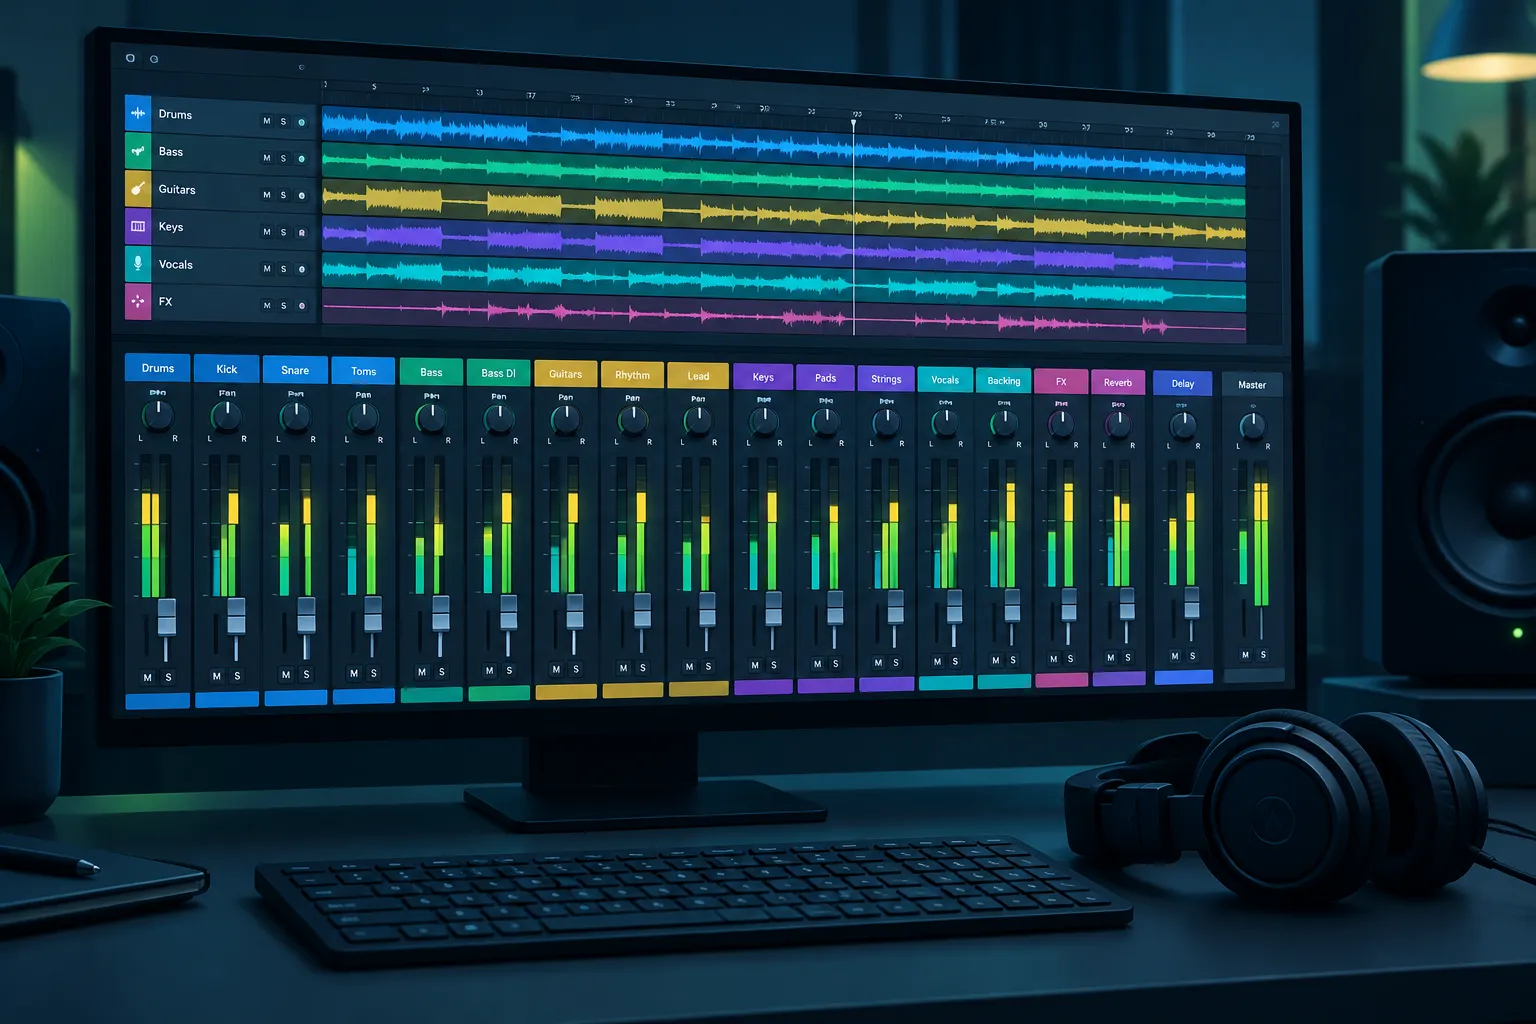
Spotify’s normalisation target is -14 LUFS integrated, and louder masters get turned down on playback, so making a mix louder gets you little on the biggest streaming service. What you need is balance, clarity and punch, and free software gives you all three. Below are ten steps in order. Each one comes with a free plugin and a starting setting, and the export targets come from Spotify’s own documentation.
Key takeaways
- Get a good balance with faders and panning before you open any plugin.
- Ardour 9.8 is the better free mixer. Audacity 4 has no buses or aux sends.
- TDR Nova and TDR Kotelnikov give you dynamic EQ and bus compression for free.
- Aim for about 3 dB of gain reduction on the mix bus, with a slow attack.
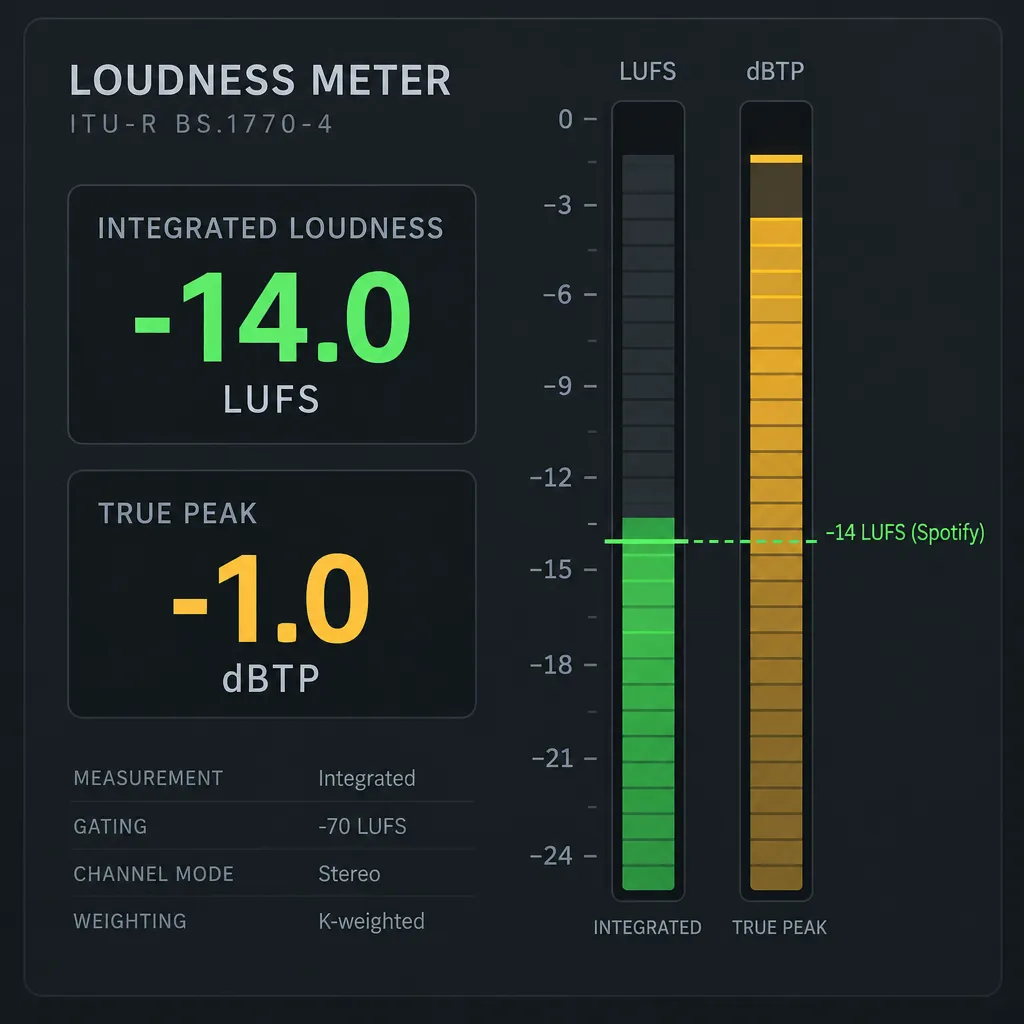
- For Spotify, master to about -14 LUFS integrated, with true peak below -1 dBTP.
Fact-checked
We checked these key facts against the sources named, on November 15, 2026:
- Fletcher and Munson first mapped them, and today they’re standardised as ISO 226 (source: iso.org)
- Drums-first means you set kick and bass so the low end hits about -6 dBFS on the mix bus, then add the rest (source: violetrecording.com)
- Use Ardour 9.8 as the DAW (open source, with ready-to-run builds from $1, or free through Linux distributions) (source: ardour.org)
- Most dance music is built in 32-beat phrases (eight bars of 4/4), so DJs start transitions at the beginning of a phrase (source: djkit.com)
- The current edition, ISO 226:2023, covers one-third-octave frequencies from 20 Hz to 12,500 Hz. iZotope’s explanation of the 80-phon curve shows that 100 Hz needs about 90 dB SPL to sound as loud as 1 kHz at 80 dB SPL (source: iso.org)
How to mix a song: the 10-step workflow at a glance
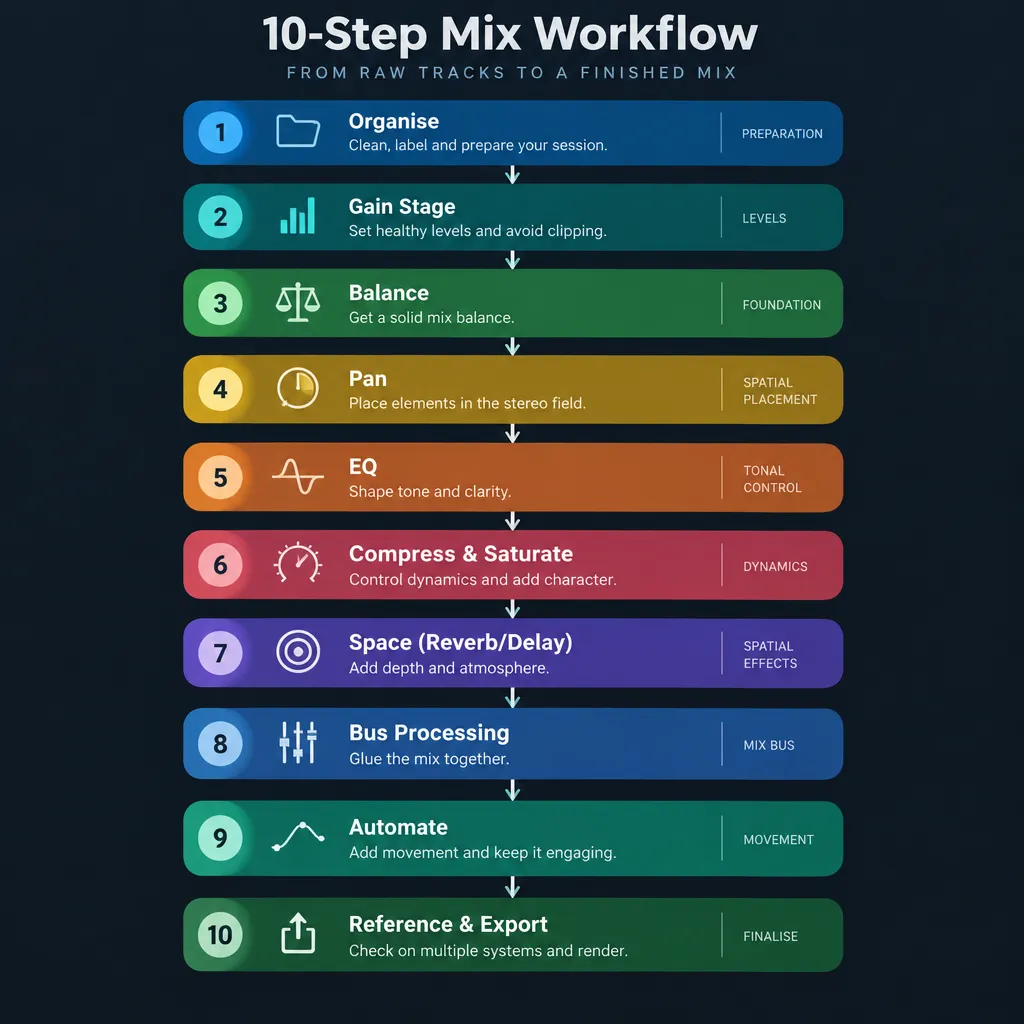
Start by organising the session and setting levels. Then get a rough balance using only faders and panning. EQ, compression and effects come after that. The order matters because each step builds on the one before it.
Quick steps: mix a song in a free DAW
- Organise: name, colour and route tracks to buses (Ardour, 20 min).
- Gain stage: set trim so tracks peak around -10 dBFS (10 min).
- Balance: faders only, densest section first (30-60 min).
- Pan: kick, snare, bass and vocal centred, the rest spread (15 min).
- EQ: high-pass, cut mud, make room for the vocal (TDR Nova, 60 min).
- Compress and saturate: control dynamics, add colour (Ardour a-Comp, Airwindows, 45 min).
- Space: reverb and delay on sends (Valhalla Supermassive or Dragonfly Reverb, 30 min).
- Bus processing: drum glue, then TDR Kotelnikov on the mix bus (20 min).
- Automate: ride the vocal, lift sections (Ardour automation lanes, 45 min).
- Reference and export: compare, check on other systems, measure LUFS (Voxengo SPAN, a loudness meter, 30 min).
For a typical song with 20 to 40 tracks, that adds up to about five or six focused hours. Your first mix will take longer. People on r/mixingmastering often say their first mix took days, and that’s normal. You get faster by repeating the same order every time.
The order works the same for a full multitrack session or a handful of stems from a producer. Stems just mean fewer faders and fewer decisions in steps 1 to 4. You can’t fix one drum mic inside a summed drum stem, so most of your work there happens with bus-style EQ and compression.
What you need: a free DAW, free plugins and something to listen on
You need three things: a DAW with buses and sends, a small set of free plugins, and headphones or speakers you know well. Ardour 9.8 covers the first one completely, and the plugins below cover every processing step.
Prepare these before you start:
- Your multitrack recordings or stems as WAV files, all at the same sample rate (44.1 or 48 kHz).
- Ardour 9.8, or Audacity 4.0.2 for simple projects.
- The free plugin kit in the table below, installed as VST3, AU or LV2.
- One or two commercial reference tracks in your genre.
- Closed or open headphones, plus at least one other playback system such as a phone or car.
If you still need to record the parts, start with a guide to recording audio on your computer for free and come back once the tracks are done.
Ardour or Audacity 4: which free DAW to mix in
Use Ardour for any real multitrack mix, because this workflow depends on buses and aux sends and Audacity 4 has neither. Ardour is open source under the GPL. The official ready-to-run builds are pay-what-you-want with a $1 minimum, the free demo build inserts silence after about 10 minutes, and many Linux distributions package it for free. If you do use Audacity, update to 4.0.2 (November 2, 2026) before you trust it with a session. That release fixed project-corruption bugs and crashes.
| Feature | Ardour 9.8 | Audacity 4.0.x |
|---|---|---|
| Latest release | 9.8, Aug 23, 2026 | 4.0.2, Nov 2, 2026 |
| Price and licence | Open source (GPL), binaries from $1 | Free, open source (GPL) |
| Platforms | Windows, macOS, Linux | Windows, macOS, Linux |
| Buses and aux sends | Yes, plus VCAs | No |
| Mixer window | Full console-style mixer | Per-track gain and pan |
| Automation | Fader, pan and plugin parameters | Clip gain envelopes |
| Plugin formats | LV2, VST2, VST3, AU (macOS), LADSPA | LV2, VST2, VST3, AU (macOS), LADSPA, Nyquist |
| Loudness checking | Analysis report on export | Loudness Normalization effect |
| Best for | Full songs, 8+ tracks | Short projects, voice, simple demos |
Audacity is made by Muse Group, and on some platforms the download page points you to MuseHub, Muse Group’s app store. You don’t need MuseHub. The editor has no watermark or paywall. For a ranked look at other options, see the best free DAWs for music production.
Doing these steps in other free DAWs
The ten steps also work in GarageBand, Cakewalk Sonar and BandLab Studio, but only Sonar matches Ardour’s routing. GarageBand gives you a limited set of shared effect sends and no custom buses. BandLab’s browser Studio puts effects on each track. In both, you have to skip or work around steps 1, 6 and 7.
| Step | GarageBand (Mac) | Cakewalk Sonar free tier (Windows) | BandLab Studio (browser, iOS, Android) |
|---|---|---|---|
| Price and catch | Free with macOS | Free with a BandLab account, periodic activation | Free with a BandLab account |
| Group buses (step 1) | Not possible as custom buses | Yes, buses can feed other buses | No group buses |
| Reverb and delay sends (step 6) | Shared send effects such as Master Echo and Master Reverb, with limited routing | Yes, right-click a track > Insert > Send | No aux sends. Effects sit on each track |
| Automation (step 8) | Mix > Show Automation (or press A), then pick a parameter | Volume, pan, sends and plugin parameters | Automation icon in the timeline: volume, pan, effects |
| Third-party plugins | AU only | VST3 | Built-in effects only |
| Loudness metering (step 10) | Level meters only. Add Youlean or x42 as AU | Add Youlean Loudness Meter 2 (VST3) | No LUFS meter. BandLab Mastering is a separate one-click service |
| Free-tier limits | None, but no pro mixer view | One Arranger Track. No plugin oversampling or Track Manager | Browser performance limits large sessions |
In GarageBand, use Master Reverb as your shared room (step 6), and put the compressor and EQ on the master track’s Output section to stand in for mix-bus processing. Click Master in the Smart Controls bar to edit it. In BandLab, use one reverb preset across every track so the parts still sound like they share a space.
Did you know?
According to Cakewalk’s help center, the free Sonar tier includes unlimited audio, MIDI and instrument tracks, the ProChannel strip and ARA support. Its main limits are a single Arranger Track and no plugin oversampling.
The free plugin kit (and which one beats its paid equivalent)
Ten free plugins cover every mixing job. Ardour’s built-in ACE plugins (a-EQ, a-Comp, a-Delay, a-Reverb) handle the basics without installing anything. The two Tokyo Dawn Records plugins are the most important ones to add.
| Mixing step | Free plugin | Open source? | Paid plugin it replaces | Why it’s enough |
|---|---|---|---|---|
| Subtractive EQ | Ardour a-EQ or LSP Parametric Equalizer | Yes | Stock Pro Tools EQ-3, FabFilter Pro-Q | Clean filters and bells are all you need for cutting |
| Dynamic EQ, de-essing | TDR Nova | No (freeware) | Paid dynamic EQs | Each band can act only when a frequency jumps out |
| Track compression | Ardour a-Comp or LSP Compressor | Yes | 1176 emulations | Ratio, attack and release are what matter |
| Mix-bus compression | TDR Kotelnikov | No (freeware) | SSL G-Bus emulations | Transparent at low ratios and slow attacks |
| Saturation | Airwindows, Klanghelm IVGI | Airwindows yes (MIT), IVGI no | Tape and console emulations | A few dB of harmonics is enough |
| Reverb | Valhalla Supermassive, Dragonfly Reverb | Supermassive no, Dragonfly yes | Algorithmic reverb suites | Lush tails. Dragonfly also runs on Linux |
| Delay | Ardour a-Delay, Valhalla Supermassive | a-Delay yes | Tempo-synced delay bundles | Tempo sync and feedback cover most moves |
| Spectrum analyser | Voxengo SPAN | No (freeware) | Analysers built into paid EQs | Shows resonances and low-end buildup |
| Loudness meter | Youlean Loudness Meter 2 (free tier), x42-meter | x42 yes | Paid loudness meters | Gives you integrated LUFS and true peak |
Attack Magazine’s 2026 free-plugin roundup keeps coming back to TDR Nova, TDR Kotelnikov, Voxengo SPAN and Valhalla Supermassive. Some come with upsells. Tokyo Dawn sells “GE” versions of Nova and Kotelnikov with extra features, and Youlean sells a Pro version. The free versions don’t time out or add watermarks.
Kotelnikov is the free plugin most worth using in place of a paid one. At a 2:1 ratio and around 3 dB of gain reduction, it glues a mix as well as most G-Bus clones and adds less colour, which beginners usually need.
Headphones, speakers and how loud to monitor
Mix at a moderate, steady level of around 80-85 dB SPL. That’s a rule of thumb, not a formal standard. Monitor level matters because your ears hear bass and treble differently at different volumes.
Equal-loudness curves explain why. Fletcher and Munson first mapped them, and today they’re standardised as ISO 226. The current edition, ISO 226:2023, covers one-third-octave frequencies from 20 Hz to 12,500 Hz. iZotope’s explanation of the 80-phon curve shows that 100 Hz needs about 90 dB SPL to sound as loud as 1 kHz at 80 dB SPL. Mix quietly and you’ll add too much bass. Mix loudly and everything sounds exciting, so your balance decisions get worse.
Headphones are fine for mixing, but they mislead you in two ways. Stereo width sounds exaggerated because each ear hears only one side. Bass can also be hard to judge, depending on the seal and the model. Check panning and low end on speakers, a phone and a car before you call the mix done.
Step 1: Prepare the session
Session prep means naming, colouring and grouping tracks so you can run the whole song from 8-16 faders. It takes twenty minutes and saves hours later.
- Name every track by what it is (“Kick In”, “Vox Lead”, “Gtr L”).
- Colour tracks by family: drums one colour, bass another, then music, vocals and FX.
- Add markers at each section (intro, verse, chorus, bridge). In Ardour, press Tab during playback to drop a marker at the playhead, then rename it in the Locations window.
- Delete silent regions and unused takes so your CPU and your attention go to real audio.
- Create buses for drums, bass, music, vocals and FX returns.
Bus routing in Ardour
A bus is a channel that adds several tracks together so you can process and move them as one. In Ardour, go to Track > Add Track, Bus or VCA, choose Audio Busses, and create one stereo bus per group.
Then open the mixer with Window > Mixer > Show. At the bottom of each track’s strip, click the output button and pick the matching bus instead of Master. Each bus then outputs to Master. Twelve drum mics now come down to one drum bus fader.
Producer tip
Route every track to a bus before you balance anything. Moving five or six bus faders shows you the shape of the song faster than moving forty track faders.
Step 2: Gain staging
Gain staging means setting each track’s input level before any plugin, so peaks sit around -10 dBFS and the average level sits near -18 dBFS. This keeps plugins working in their sweet spot and leaves headroom on the mix bus.
In Ardour, use the trim knob at the top of each mixer strip. It adds or removes gain before the processing chain. You can also adjust region gain in the editor. Play the loudest part of each track and watch its meter.
Why bother when digital audio rarely clips inside the DAW? Many compressors and saturators react to input level. A track peaking near 0 dBFS drives a saturator hard and makes the mix harsh. Twenty hot tracks added together also push the mix bus into its limiter, or into clipping on export. Gain staging prevents both.
Step 3: Static balance and panning
A static balance is the best mix you can make with faders and pan pots alone. Start in the densest section, usually the last chorus, because that’s where the mix works or falls apart.
Loop that section, pull every fader down, and bring parts up one at a time in order of importance. Take your time here. A good static balance is often 70% of the finished mix.
Producer tip
Balance the densest chorus with faders and pans only before you open any plugin. If it can’t sound decent that way, EQ won’t fix it.
Where to start: drums first or vocal first?
Both work. Start with the vocal for songs, and with drums and bass for beat-driven music.
Vocal-first means you set the vocal at a comfortable level and fit everything else around it. That suits pop, singer-songwriter and rock, where the listener follows the voice. Drums-first means you set kick and bass so the low end hits about -6 dBFS on the mix bus, then add the rest. That’s the natural order for hip-hop, EDM and other loop-based or beat-driven tracks. Behind “drums or vocals first?” is a simpler question: what matters most in this song? Start there.
Panning map
Keep anything with strong low end in the centre, and spread everything else so each part has its own spot.
| Source | Typical pan |
|---|---|
| Kick, snare, bass, lead vocal | Centre |
| Overheads, room mics | Left/right, from the drummer’s or the audience’s view (pick one) |
| Doubled rhythm guitars | Hard left and hard right |
| Single guitar or keys part | 30-60% to one side, balanced by another part opposite |
| Backing vocals | Spread in pairs, 40-80% |
| Reverb and delay returns | Full stereo |
Keep everything below about 100-120 Hz in mono. Wide bass sounds big in headphones and falls apart on a club system or a phone speaker.
Step 4: EQ: cut first, then shape
Use EQ to remove problems before you boost anything. Three careful cuts help most beginner mixes more than ten boosts. A guide to EQ basics covers filter types and Q in more depth.
Start with a high-pass filter on every track that doesn’t need low end: vocals, guitars, keys, overheads, percussion. Raise the cutoff until the part starts to sound thin, then back off a little. On a vocal that’s often around 80-120 Hz. On pads and acoustic guitar it can be 150-250 Hz.
Fixing mud
Mud is too much energy between roughly 100 and 300 Hz, built up from many tracks at once. Fix it with many small cuts, not one big one.
Try a wide bell cut of 1-3 dB somewhere in that range on guitars, keys and pads, and sweep it until the mix opens up. Voxengo SPAN helps here: look for the bump that sticks out above the rest of the spectrum. Mastering The Mix’s list of common mixing mistakes gives the same fix: high-pass anything that doesn’t need lows, then cut the low mids gently.
Making room for the vocal
Vocal clarity lives around 2-5 kHz, and guitars and keys compete there. Cut a small, gentle dip around 2.5 kHz on those instruments so the voice sits on top without turning it up.
If the clash comes and goes, use TDR Nova as a dynamic EQ. Set one band on the guitar bus at 2.5 kHz and feed the vocal into Nova’s sidechain if your routing allows it. The dip then happens only while the singer sings. Nova also works as a de-esser. Put a band at 5-8 kHz on the vocal and set the threshold so it turns down only the “s” sounds, by 3-6 dB.
Step 5: Compression and saturation
Compression evens out level so a part stays in a steady place in the mix. Saturation adds harmonics so a part sounds fuller at the same volume. Use both gently on individual tracks. Bus compression comes later and does a different job.
Downward compression, the normal kind, turns down peaks above a threshold. Upward compression raises quiet detail, such as a vocal’s breaths and tails. Most free compressors, including Ardour’s a-Comp, work downward, so start there.
Starter compressor settings
These are starting points to adjust by ear, not fixed rules. Watch the gain-reduction (GR) meter and aim for the amounts shown.
| Source | High-pass start | EQ move | Compression start | Pan |
|---|---|---|---|---|
| Kick | 30-40 Hz | Cut 300-400 Hz boxiness | 4:1, attack 10-30 ms, release 50-100 ms, 3-6 dB GR | Centre |
| Snare | 80-100 Hz | Body around 200 Hz, cut ring | 4:1, attack 5-15 ms, 3-5 dB GR | Centre |
| Bass | 30-40 Hz | Cut 200-300 Hz if muddy | 4:1, attack 10-30 ms, 3-6 dB GR | Centre |
| Lead vocal | 80-120 Hz | Cut 200-400 Hz boxiness, de-ess 5-8 kHz | 3:1-4:1, attack 5-10 ms, release 50-80 ms, 4-6 dB GR | Centre |
| Electric guitars | 80-120 Hz | Dip around 2.5 kHz | Often none, or 2:1 light | Hard L/R doubles |
| Acoustic guitar | 100-150 Hz | Cut 200-300 Hz, dip 2.5 kHz | 3:1, 2-4 dB GR | 30-60% |
| Keys and pads | 150-250 Hz | Wide low-mid cut | 2:1, 1-3 dB GR | Wide |
| Overheads | 150-300 Hz | Tame harsh cymbals around 3-5 kHz | Usually none | L/R |
| Mix bus | Off or 20-25 Hz | None at first | 2:1, slow attack, auto release, about 3 dB GR | Stereo |
A slower attack lets the transient through, which gives punch. A faster attack cuts it, which makes a part smoother and sit further back.
Adding character with free saturation
Saturation is a quick way to make a thin bass or a dull vocal sound present. Airwindows plugins (open source, MIT licence, on every platform) and Klanghelm IVGI (freeware, Windows and macOS) both do it well. Start with low drive and match the output level, so you don’t mistake louder for better.
Saturation adds harmonics, including some low-frequency energy and rumble. Put another high-pass filter after the saturator on non-bass tracks. For the theory, see the guide on what saturation is and how to use it in a mix.
Step 6: Reverb and delay on sends
Put reverb and delay on aux buses and send tracks to them, rather than inserting them on each track. Sends use less CPU, keep effects consistent, and let you set each effect’s level with one fader.
In Ardour, create a stereo bus called “Room Verb”. Right-click in a track’s processor box, choose New Aux Send, and pick that bus. Set the reverb plugin on the bus to 100% wet. Then raise each track’s send knob to taste.
Use one shared short room reverb on most tracks so they sound like they were recorded in the same space. Add a longer hall or plate for the vocal, and a tempo-synced delay (quarter or eighth note) that ducks under the vocal. TDR Nova or a sidechained compressor on the delay return can do the ducking. Keep return faders lower than you think. If you can clearly hear the reverb as a separate sound, it’s probably too loud.
Step 7: Bus and mix-bus processing
Bus compression makes a group of tracks move together. Its job is glue, not controlling any one part. Do the drum bus first, then the mix bus.
On the drum bus, try TDR Kotelnikov at 4:1 with a medium attack (around 10-30 ms) and 2-4 dB of gain reduction on snare hits. That adds punch and makes separate mics sound like one kit.
For the mix bus, Abbey Road Institute’s guidance gives a classic starting point: slow attack, low ratio, auto release, and about 3 dB of gain reduction in the loudest section. Their article uses an SSL G-Bus emulation in Pro Tools. Kotelnikov at 2:1 with a 30 ms attack and auto release gets you the same result for free. Add mix-bus compression once the static balance is solid but early enough that your later balance decisions happen through it.
Watch out
A limiter on the master while you mix hides clipping and squashes your balance decisions. Leave it off, or use one only to check loudness, then bypass it before you export a mix for mastering.
Step 8: Automation
Automation turns a static mix into a performance. The most important move is riding the lead vocal fader so every word comes through.
In Ardour, click the “A” button on a track header and choose Fader to show its automation lane. Set the mode to Touch, play the song, and move the fader. Ardour records only while you hold the fader and returns to the existing curve when you let go. Use Write for a first pass and Touch for fixes.
Useful moves:
- Raise quiet vocal words by 1-3 dB and lower loud ones.
- Lift the chorus music bus by 1-2 dB so the chorus feels bigger.
- Automate a high-pass filter sweep on the music bus into a drop.
- Mute delay throws everywhere except the line endings you choose.
- Pull reverb sends down in busy sections so the mix stays clear.
Step 9: Reference and check on other systems
Compare your mix with a commercial track in the same genre at the same loudness. Then play it on at least three systems before you decide it’s done.
Import the reference into its own track in Ardour and turn it down until a loudness meter reads the same for both. A mastered song is louder than a mix, and louder always sounds better at first, so an unmatched comparison misleads you. That’s also why comparing a rough mix with a pro reference feels so discouraging. Matched in level, the gap is usually much smaller and easier to fix.
Check on headphones, laptop speakers, a phone, earbuds and a car. Write problems down instead of fixing them on the spot. Take a 10-15 minute break about every hour, because tired ears stop hearing high frequencies accurately and harshness creeps in.
Step 10: Export the mix (and loudness for Spotify, YouTube and Apple Music)
If someone else will master the song, export one stereo WAV at the session’s sample rate, in 24-bit or 32-bit float, with peaks around -6 to -3 dBFS. If you’re making your own demo master, set the loudness to the platform target and keep true peak below the ceiling.
In Ardour, go to Session > Export > Export to Audio File(s), choose WAV, and tick the option to analyse the exported audio. The report shows integrated loudness and true peak, so you don’t need a separate meter just to check the file.
Mixing versus mastering
Mixing balances many tracks into one stereo file. Mastering prepares that file for release: overall tone, final loudness, true-peak limiting and consistency across an album. Keep the two separate. Mix without a master limiter, export, then master in a new session or with a dedicated tool. IK Multimedia offers T-RackS 5 as a free product with a selection of processors, and some people use it for this stage. A dedicated mastering guide covers the limiter settings.
Loudness targets by platform
Spotify, Apple and YouTube all publish their own loudness guidance. The Apple Music and YouTube figures here are approximate, so treat them as estimates.
| Platform | Normalization target | True-peak advice | Turns quiet tracks up? | Source type |
|---|---|---|---|---|
| Spotify (Normal) | -14 LUFS integrated (ITU-R BS.1770) | Below -1 dBTP for tracks louder than -14 LUFS. Below -2 dBTP for lossy formats | Yes, keeping 1 dB of headroom | Official, Spotify for Artists |
| Spotify Premium “Loud” | -11 LUFS | Spotify applies a limiter | Yes | Official |
| Spotify Premium “Quiet” | -19 LUFS | Same as Normal | Yes | Official |
| Apple Music Sound Check | About -16 LUFS | Below -1 dBTP is usual practice | Commonly reported | Official Apple guidance, approximate figure |
| YouTube | About -14 LUFS | Below -1 dBTP is usual practice | No, only turns loud tracks down | Official YouTube guidance, approximate figure |
Spotify measures loudness when you upload and doesn’t change your file. It only adjusts gain at playback. A whole album gets one gain value, so a quiet interlude stays quieter than the loud single, the way you mixed it.
Did you know?
According to Spotify for Artists, the Spotify web player and third-party devices don’t apply loudness normalization at all, so a quiet master really does play quieter there.
This is also why your song sounds quieter than commercial tracks when you play files side by side outside Spotify. Commercial masters are often limited well above -14 LUFS. Inside an app that normalizes, most of that difference disappears.
Troubleshooting: why does my mix sound…
Most mix problems come from the same few causes. Find your symptom below and try the fix before you add anything new.
| Symptom | Likely cause | Fix |
|---|---|---|
| Muddy | Low-mid buildup, no high-passing | High-pass non-bass tracks. Cut 1-3 dB wide between 100-300 Hz |
| Harsh | Too much 2-5 kHz, hot gain staging, fast compression | Lower input trim. Use TDR Nova dynamic cuts. Slow the attacks down |
| Vocal buried | Instruments filling 2-5 kHz, too little vocal compression | Dip 2.5 kHz on guitars and keys. Compress 4-6 dB. Ride the fader |
| Vocal sits on top of the beat | Too loud, too dry, too bright | Lower it 1-2 dB. Add the shared room reverb. Soften the top end |
| Thin | Too much high-passing, missing low-mid body | Lower HPF cutoffs. Add gentle saturation on bass and vocal |
| Great in headphones, bad in the car | Wide bass, misjudged low end, exaggerated stereo | Mono below 100-120 Hz. Check bass on SPAN. Re-check on speakers |
| Too quiet next to commercial songs | Unmastered mix, unmatched comparison | Master to -14 LUFS for Spotify, or compare at matched loudness |
Mixing vocals, mixing for YouTube, DJ mixing and Spotify playlists
“How to mix” can mean several different jobs, and only the first two are studio mixing. Here’s the short answer for each.
Mixing vocals. The vocal chain follows the same order as everything else: high-pass, cut boxiness, compress 4-6 dB, de-ess with Nova, send to a plate reverb and a ducked delay, then ride the fader. A separate guide to mixing vocals goes deeper on doubles and harmonies.
Mixing for YouTube video. Spoken voice needs consistent level more than anything else. Compress harder (4:1, with 6-8 dB of gain reduction on speech), keep music beds well under the voice, and export at about -14 LUFS with true peak below -1 dBTP.
DJ mixing. This is a different skill: blending finished tracks live. The “rule of 32” is about phrasing. Most dance music is built in 32-beat phrases (eight bars of 4/4), so DJs start transitions at the beginning of a phrase. The tools and training are separate from studio mixing.
Mixing songs in a Spotify playlist. This is a listening feature, not production mixing, and it doesn’t change anyone’s files. Crossfade, under Settings > Playback, overlaps the end of one song with the start of the next for a set number of seconds, and Spotify’s “Transitions between tracks” help page lists it as a Premium feature. Where it has rolled out, Premium users can also open a playlist and tap Mix in the toolbar to pick Auto, Fade, Rise or Blend transitions between songs. Spotify still labels Mix as beta, and it applies transitions to every gap in that playlist.
Can ChatGPT or AI mix your music?
No. A chatbot can’t hear your session, so it can’t make balance decisions. It can explain what a compressor’s attack does or suggest a starting setting, which is about what a book can do.
Ardour 9.5 (May 2026) added a community-contributed, experimental MCP server. MCP, the Model Context Protocol, lets an AI model running locally on your computer control the DAW. It’s off by default. You turn it on in Edit > Preferences > Control Surfaces with the “MCP HTTP Server (experimental)” checkbox. Ardour’s release notes say it doesn’t generate audio, and coverage points to accessibility as a main use, such as helping users with vision impairments. It’s a new way to control the DAW, and it doesn’t mix for you.
The automatic “mix assistant” tools in paid suites set rough starting points. Your ears still make the final calls in steps 3, 8 and 9.
FAQ
How do I start mixing?
Organise the session, set input gain so peaks sit around -10 dBFS, then balance the densest chorus with faders and panning only. Add EQ and compression once that rough mix works.
How do I mix music for beginners?
Follow one fixed order every time: prep, gain staging, balance, panning, EQ, compression, effects, bus processing, automation, reference. Keep moves small (1-3 dB on EQ, 3-6 dB of gain reduction) and check your work on several systems.
How do I mix music for free?
Use Ardour 9.8 as the DAW (open source, with ready-to-run builds from $1, or free through Linux distributions). Add its built-in ACE plugins, TDR Nova, TDR Kotelnikov, Voxengo SPAN and a free reverb such as Valhalla Supermassive or Dragonfly Reverb. Free and stock plugins are enough. Skill matters far more than the plugins.
Can I mix in GarageBand, Cakewalk or BandLab instead?
Yes. Cakewalk Sonar’s free tier on Windows has full buses, sends and automation, so every step works there. GarageBand and BandLab Studio both have automation, but neither lets you build custom group buses. GarageBand has only limited shared send effects, and BandLab puts effects on each track.
How do I mix music on my computer?
Install a free DAW with buses and sends (Ardour on Windows, macOS or Linux, or Cakewalk Sonar on Windows), import your WAV files at one sample rate, and work through the ten steps above. Headphones are enough to start, as long as you check the result on a second system.
What order should I mix in?
Organise, gain stage, balance, pan, EQ, compress and saturate, add reverb and delay, process buses, automate, then reference and export. Go back to an earlier step whenever a later one shows a problem.
Should I mix drums or vocals first?
Start with the vocal for vocal-led songs, and with kick and bass for beat-driven genres. Either way, balance the loudest section first.
How loud should my mix be before mastering?
Leave peaks around -6 to -3 dBFS, with no limiter on the master. Final loudness in LUFS is set at mastering.
What LUFS should I mix to for Spotify?
Mix by ear, then master to about -14 LUFS integrated with true peak below -1 dBTP, per Spotify for Artists. Spotify recommends keeping true peak below -1 dBTP for tracks louder than -14 LUFS, and below -2 dBTP for lossy formats.
How do I make songs blend into each other on Spotify?
Turn on Crossfade in Settings > Playback, or use the Mix tool in a playlist’s toolbar if your Premium account has it. Both only change playback on your device. Neither changes the songs themselves.
Can I mix on headphones?
Yes, with checks. Headphones exaggerate stereo width and can misrepresent bass, so confirm low end and panning on speakers, a phone and a car.
How do I mix vocals so they sit in the beat?
Make room with a small dip around 2.5 kHz on competing instruments, compress the vocal 4-6 dB, send it to the same room reverb as the band, and ride the fader word by word.
Should I put a limiter on the master while mixing?
Only to preview loudness, then bypass it. A mix-bus compressor at about 3 dB of gain reduction is fine. A limiter hides problems you need to hear.
What is the rule of 3 in music?
There’s no single fixed definition. In songwriting it usually means repeating an idea three times and changing it the fourth time. Mixers use it loosely to mean that only about three parts should compete for attention at once. If more than three are fighting, use level, EQ or automation to push one back.
Before your next mix, copy the ten steps from the box at the top into a text file next to your session and tick each one off as you go. That stops you skipping the two steps that cause the most problems: gain staging and referencing.
Keep reading
Free music tools
Editorial notes
- Fact-checked by Vivian Osei against the sources listed below before publication.
- Published
Sources (8)
- Ardour 9.8 released (ardour.org)
- Ardour 9.8 DAW Released with Initial Scales Support, Better Recording Recovery (linuxiac.com)
- Ardour 9.0 released (ardour.org)
- Ardour 9.5 released (ardour.org)
- Ardour 9.5 adds pianoroll chord editing, MIDI workflow boosts, and MCP server (alternativeto.net)
- Frequently Asked Questions about Ardour (ardour.org)
- Ardour forum: Silent Mode (discourse.ardour.org)
- Loudness normalization on Spotify (support.spotify.com)